Originally posted 2018-11-14 12:41:45.
 I know I have done a few articles now about Sonoff switches and MQTT in Home Assistant. However a lot has changed – also my understanding has changed and so it’s time for another post about this. I’m also going to take a crack at making a video showing how to flash a sonoff switch with Tasmota.
For reference, my previous posts can be found here:
So lets look at the changes in MQTT introduced with the new MQTT
Setting up to use MQTT v3 or v4 addon for Home Assistant
The new addon for Home Assistant does a number of things.
You need to have the new Mosquito addon installed now then read on.
Previously, it was necessary to have a mqtt section in configuration.yaml that looked like this:
mqtt:
  broker: core-mosquitto
  username: !secret mqtt_user_name
  password: !secret mqtt_password
With the new add-on, these lines are deleted entirely! So delete them and restart Home Assistant.
Don’t worry about any errors occuring at this stage.
Next, the add-on now supports the ‘new’ Auth system and Home Assistant users. The configuration of the old add-on looked something like this:
{
  "logins": [
    {
      "username": "username",
      "password": "password"
    }
  ],
  "anonymous": false,
  "customize": {
    "active": false,
    "folder": "mosquitto"
  },
  "certfile": "fullchain.pem",
  "keyfile": "privkey.pem",
  "plain": true,
  "plain_websockets": true,
  "ssl": false,
  "ssl_websockets": false
}
In the logins section, the username and password here are the MQTT username and password you previously had in configuration.yaml as above and were also set as the MQTT settings in Tasmota.
The new add-on settings look like this:
{
  "logins": [],
  "anonymous": false,
  "customize": {
    "active": false,
    "folder": "mosquitto"
  },
  "certfile": "fullchain.pem",
  "keyfile": "privkey.pem"
}
These are my settings and to make that work, what I did was I created a new user in Home Assistant that used my previously entered username and password. This means I didn’t have to change the settings for MQTT in Tasmota! As I am not using a local user now, I can just leave that blank. Also, it isn’t necessary to specify ssl anymore – that is auto detected!
I do recommend migrating to using a new Home Assistant user instead of a local user. According to the add-on docs, the local user is ‘currently supported’ and I see that as a warning that the local user is not going to be supported at some future point. There are some caveats. It seems a lot of people used the username of homeassistant and this is now a reserved name so if you have used that you will need to edit the mqtt settings in all your devices to a new username ans password. The username addons is also reserved and cannot be used. Don’t forget to restart the add-on after you reset it to defaults and reconfigure mqtt if required.
Finally, you will need to configure the integration. I previously had an MQTT auto-detected configuration and it referenced configuration.yaml. You need to remove this integration and will probably be prompted to restart home assistant. Then the new integration can be added. There might be an error adding the integration from the discovered section of integrations. If there is, don’t worry – just search down the list of components under the ‘Set up a new integration’ section for mqtt and add it from there. You will be prompted for the IP address and the username and password. The IP address will be either 127.0.0.1, localhost or the real IP address of the broker.
I also deleted my MQTT Sonoff switches from configuration.yaml so I then had nothing at all related to mqtt anywhere in my configuration.yaml.
Recap Migrating
1. Remove all MQTT entries – broker and switches from configuration.yaml
2. Set up the new Broker just using defaults

3. Setup a new home assistant user for mqtt instead of a local user
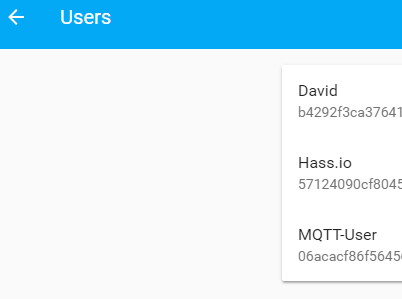
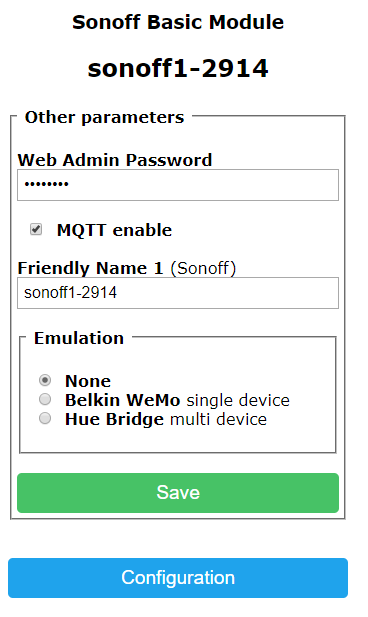
(Note I *could* continue to use the main home assistant user David however, creating and using the same user I had previously used in Tasmota meant I did not need to change any mqtt settings. Also note that the displayed name is not necessarily the username – it isn’t in my case as you will see from the Tasmota screenshot below)
4. If necessary, configure Tasmota for the new MQTT User
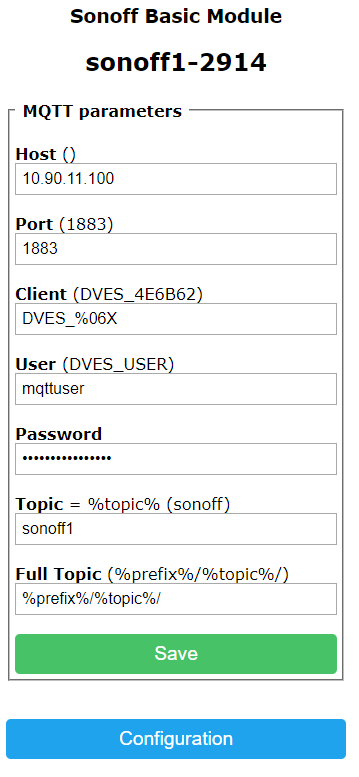
(See the different username)
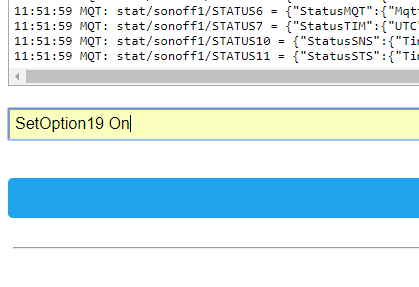
5. Configure Tasmota for discovery. Since firmware version 5.12 of Tasmota, it has been possible to enable mqtt discovery of Tasmota devices. To enable this, go into the Tasmota console and execute the command SetOption19 On
6. Check you have added the MQTT integration in Home Assistant

7. Once you have done this, you should see your switches/sonoff devices by discovery
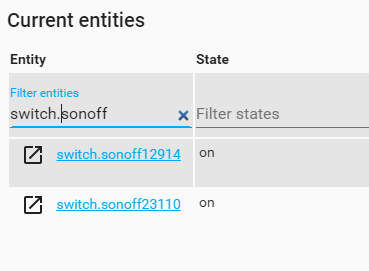
Note that these don’t have a very friendly name but that is because of the way I have them named in Tasmota
If I set this friendly name differently they would display differently when discovered. The customize.yaml file or graphical configuration customizer can be used to set the icon and a friendly name.
8. You may need to update or check the following files to set the new switch names:
customize.yaml
groups.yaml
ui-lovelace.yaml
automations.yaml
google_assistant.yaml **note only if you use this type as an inclusion in configuration
The list isn’t exhaustive – just find and edit what you need to.
9. Once done and after restarting, your switches and other mqtt devices should all be working normally again.
Flashing Sonoff Switches with Tasmota
A few things needed for this. Please also see my previous posts linked up above for further details.
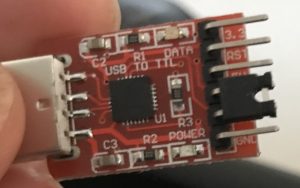
You will need a USB serial adapter. I just looked for CP2102 on ebay and purchased this one for around $5
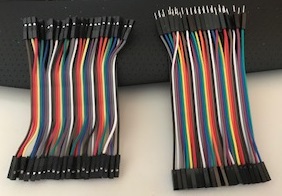
Also some dupont cables.. I got some with and without a pin on one end – cost ~$5 for both from Alibaba and some header pins for ~$1 on ebay..

Using the USB adapter and the cables with pins on one end I was able to make a ‘plug’ for flashing the switches like this:
![]()
It’s a bit hard to see here but I have the red and the orange wire crossed over (TX-RX). The ends of the cable with the pins have a squared end so you can hold them together and tape them up like I have done.
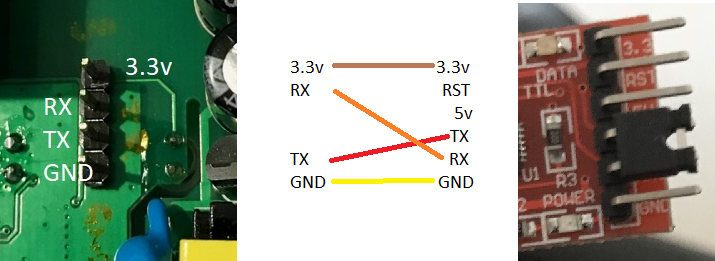
I know this looks ‘wrong’ but the USB is going to be ‘flipped over’ if that makes sense. In any case, this cable does work!
See my video below where I attach the Sonoff to the USB using this cable. Then see my previous post as well for instructions on using PlatformIO to flash Tasmota on the Sonoff. Note: don’t follow the subsequent instructions in that post/link to set up in Home Assistant as the information in this post above here now supersedes that.
Other Tasmota Settings
I have covered this in my previous posts as well however, it’s such a common problem to have odd things happening with switches. In my case, the switches would turn on every time they connected to the WiFi network. This is because of retention being set. The solution is to turn this off and delete the mosquito.db – the persistence database. The easiest way to do this if you are using Hass.io is to remove the MQTT add-on and then add it back again.
If you are configuring the switches in a yaml file and not using MQTT discovery, then make sure you have this for each switch.
retain: false
Make sure you restart Home Assistant if you change the yaml file. I would also restart Home Assistant when I delete the add-on before adding it back again as well. May not be necessary but can’t hurt!
Then from the Tasmota Console for each switch send these commands:
switchretain off
buttonretain on
buttonretain off
poweronstate 3
powerretain on
The logic behind this is contained in this video:
Lastly, I also have an automation that runs when Home Assistant starts. See here for a link to the Tasmota wiki that shows this:
- id: 'Tasmota Clear Retain'
  alias: "Power State Sonoff on HA Start-Up"
  initial_state: 'on'
  trigger:
    platform: homeassistant
    event: start
  action:
  - service: mqtt.publish
    data:
      topic: "cmnd/sonoffs/power1"
      payload: ""
  - service: mqtt.publish
    data:
      topic: "cmnd/sonoffs/power2"
      payload: ""
  - service: mqtt.publish
    data:
      topic: "cmnd/sonoffs/Power3"
      payload: ""
  - service: mqtt.publish
    data:
      topic: "cmnd/sonoffs/power4"
      payload: ""
Set Time Zone in Tasmota
While we are playing around with the console, it is also possible to set the time zone for Tasmota. This could be useful when you are looking through the log or if you use the Tasmota web admin to set timers instead of using Home Assistant.
TimeZone 99
TimeDST 1,1,10,1,1,660
TimeSTD 1,1,4,1,2,600
Check here https://github.com/arendst/Sonoff-Tasmota/wiki/Commands#management for the parameters. The above is for DST in Sydney – we go forward 1 hour on first week of October and back to EST on first week of April. Check the wiki for the correct syntax for your timezone.