Originally posted 2019-09-03 13:57:09.
NOTE CADDY 2.x has been released and this information is a GUIDE for installing that only. I will be doing an updated blog post for the new version soon.
 One of the really great things about using the Caddy addon for home assistant has been that it provides a more secure system as it provides automatic SSL certificates and a reverse proxy and manages renewing the certificates before expiry.
I had always been unhappy however that since LetsEncrypt dropped support for https certificate validation that it required port 80 to be opened and forwarded on the router in order to renew certificates. This isn’t a huge risk as long as you are using a properly configured firewall. Even most consumer level routers include a SPI (stateful-packet-inspection) firewall and will drop incoming requests if they have not been initiated from within the network. In the case of SSL certificates, the Home Assistant SSL or Caddy addon would open the port to request the certificate validation from LetsEncrypt and thus it would be able to respond to the challenge and validate the request and get the new certificates; port 80 would then be closed and no requests would get through. This works well and if you used a port scanner you would see that the port was closed.
Some 6 or so months ago, Caddy added support for using a DNS challenge instead of the http challenge – it just wasn’t exactly clear to me how that worked and how to set it up and I was told that you needed to build a custom version of Caddy as it was not built into the Caddy binary provided by the addon – which sounded like hard work and I didn’t totally understand what was required. On Linux systems, building your own or compiling from source is fairly common and something I have done a lot of times but I didn’t really have the drive or inclination to do this for Caddy particularly as it has been working just fine with http validation.
So what changed? Well a couple of things. First, the Caddy version in the addon was now several versions out-of-date (having not been updated for a while) and there had been a couple of vulnerabilities that had been fixed, but secondly, I discovered that rolling your own version and using it wasn’t any more involved than a few mouse clicks! So instead of changing the original article I decided a new one was in order and here we are. If you read this article as well as my first article here you will have your system running this new way in no time and with very little effort.
Install Duckdns
First step to setting this up is to setup a DuckDNS account which is free. (Note: You don’t have to use DuckDNS and at the end I’ll show how to use a different DNS provider.) Go to https://www.duckdns.org/ and log in using one of Persona, Twitter, Github, Reddit or Google. When you log in, the app for the login will require you to authorise DuckDNS to use that account for logging in. You will only generally need to log into DuckDNS once. Here is my screen when I log in with my Twitter account.
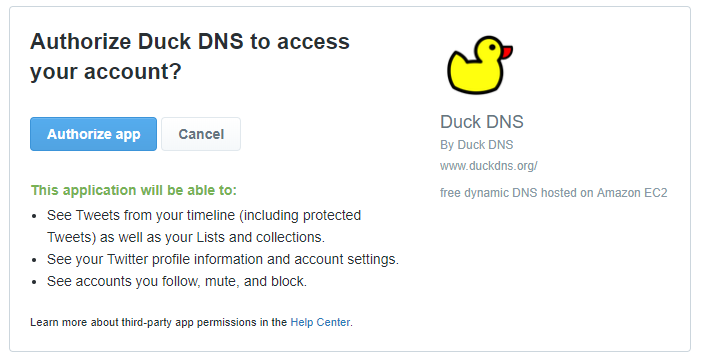
Just tap on Authorize app and you will be returned to a screen where you can create your duckdns domain. Duckdns allows you to create up to 5 domains. You don’t need to create sub-domains.
 Duckdns won’t allow you to create a domain that already exists on their system. Make sure you keep a note of the domain name you created here!
You also need to make sure you copy the token down as you will need to enter that information when you setup the DuckDNS addon and Caddy!

Update DuckDNS with the current IP Address of your Home Assistant
Once you have a duckdns address, you need to update the record at duckdns with the current IP address of your home assistant instance. (If you are not using DuckDNS you will need either a static IP address or some way of updating the other provider domain with your current IP address. More on this later) There are actually multiple ways you can do this depending on your network setup and environment.
When I first started doing this, I let the DuckDNS client in my Router update the duckdns record for me. I also had port forwarding to forward https traffic on port xxxxx to my Home Assistant instance. (See my previous blog post for details) This worked well for me. However, my ISP now supports IPv6 dual stack and I wanted to be able to setup my system to use IPv6. This is a little more complicated as with IPv6 every device you expose to the internet (by opening up a port in the router) actually has it’s own real IP address in the internet – there is no port forwarding. Port xxxxx in the internet opened will make port xxxxx on the device directly accessible on the device. So whereas with IPv4 I would forward a port on my router, with IPv6 I open the port and point that to the device itself. This means using the Duckdns client on my router to update the public IPv6 address on the device does not work. (Because I want the IPv6 address of my home assistant instance, not my router) I also have not tried this but I don’t believe the DuckDNS addon in Hass.io supports IPv6. So instead, I use a shell script (examples are here: https://www.duckdns.org/install.jsp ) In fact, if you are using IPv6, your ISP most probably has allocated you a static IPv6 prefix so the IPv6 IP address of your Home Assistant will be fixed and won’t change anyway in which case you can just manually enter the IPv6 address on the DuckDNS site. (also if not using DuckDNS, if you do have a static IPv6 address, you will just update the DNS ‘AAAA’ record for your domain with that address instead of having to dynamically update the address all the time)
Sorry if that got a bit technical and if you don’t understand a word of what I said in the above paragraph, don’t worry. We can just now setup the DuckDNS addon in Hass.io to handle the DuckDNS IP address updates for you. The DuckDNS addon is a core addon and you should install that as you would any other addon. For the addon settings, set it up like this:
{
  "lets_encrypt": {
    "accept_terms": false,
    "certfile": "fullchain.pem",
    "keyfile": "privkey.pem"
  },
  "token": "YOUR_DUCKDNS_TOKEN_HERE",
  "domains": [
    "your-domain-here.duckdns.org"
  ],
  "seconds": 300
}
Note: Enter your token and domain information. Set accept_terms to false as we don’t need the addon to obtain the SSL certificates because Caddy will take care of that for us. Next start the addon. At the bottom (check the log at the bottom) make sure it was able to update the address at DuckDNS.
Now that your duckdns domain is being updated with your dynamic IP address, we can move on and setup Caddy with DNS validation and without opening or forwarding any other ports.
Setting up Caddy
In addition to installing the Caddy addon we also need to setup a file called a Caddyfile that sets up the domain we are proxying and where incoming requests to that domain are forwarded.
The Caddyfile goes in the Share directory. The share directory is at the same directory level as the directory holding all your yaml files. It might already have a mosquitto directoryif you use MQTT. If I open up samba and browse to the Hassio directory you will see this:

In this directory all my yaml files are in the config directory ans the share directory is where we will create a caddy directory.
Here is what my share directory contains:
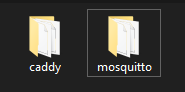
My share directory also contains a mosquitto folder with my acl files. Then the caddy directory will contain these files:
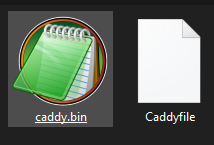
Don’t worry about the caddy.bin file for the moment – we will come back to that later. (Note the directory names and file names appear to be case sensitive – everything is lower case except the Caddyfile)
A basic Caddyfile looks like this:
your-domain.duckdns.org:xxxxx {
    tls {
	    dns duckdns
	}

    header / {
    Strict-Transport-Security "max-age=31536000; includeSubdomains"
    X-XSS-Protection "1; mode=block"
    X-Content-Type-Options "nosniff"
    X-Frame-Options "SAMEORIGIN"
    Referrer-Policy "same-origin"
    -Server
}
    proxy / localhost:8123 {
        websocket
        transparent
        header_upstream Authorization {>Authorization}
    }
}
Ok so I said it’s a basic file but maybe not…
Note the your-domain.duckdns.org:xxxxx which will be the URL you will use to access home assistant. The xxxxx represents the port number you want to use. You can only that if you would like to however I would recommend not using a standard port but instead using a high port number like 44444. Yes it’s security by obscurity in part but just think.. if evern house in a street has a front door in the same place, hiding yours somewhere unexpected will reduce the ‘passing’ random traffic. Having a high numbered port also means you probably won’t get hit by many port scans as hackers generally (mostly) scan ports 1-1024.
The tls section tells it we want to use dns validation for the domain.
Next section is some header information – see my previous article for more information about that.
Lastly, we are proxying this to the local machine on port 8123 – in other words Home Assistant. Note you can also have sub domains that follow the exact same format. So if someone types in your-domain.duckdns.org:xxxxx to a web browser, it will automatically ‘proxy’ and server localhost:8123 (your home assistant server)
So now we have added the Caddyfile, next thing to do is to actually install Caddy.
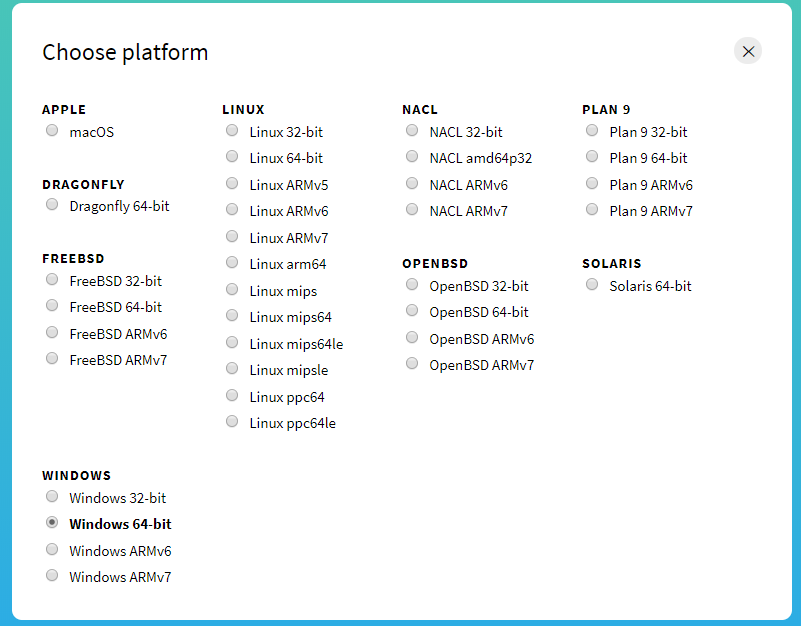
First, what we are going to do is to download a custom version of Caddy from here. This will take you to a screen looking like this:
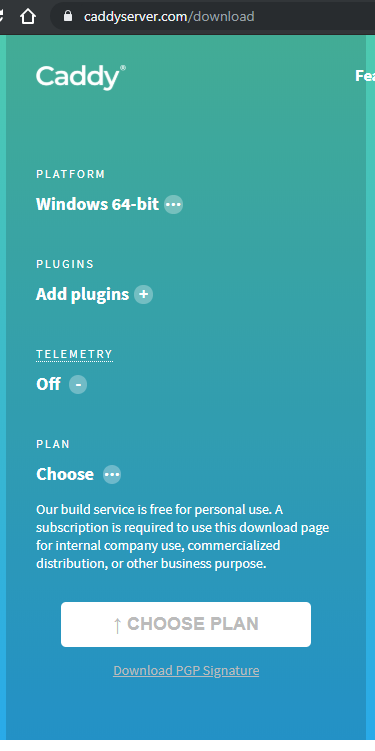
On this screen, click on the 3 dots next to Windows 64bit and select the operating system for your home assistant server. This will typically be Linux ARMv7 if you are using a Raspberry Pi or Linux 64-bit if you are using say Debian on a NUC.
Next, click on the link to add plugins.
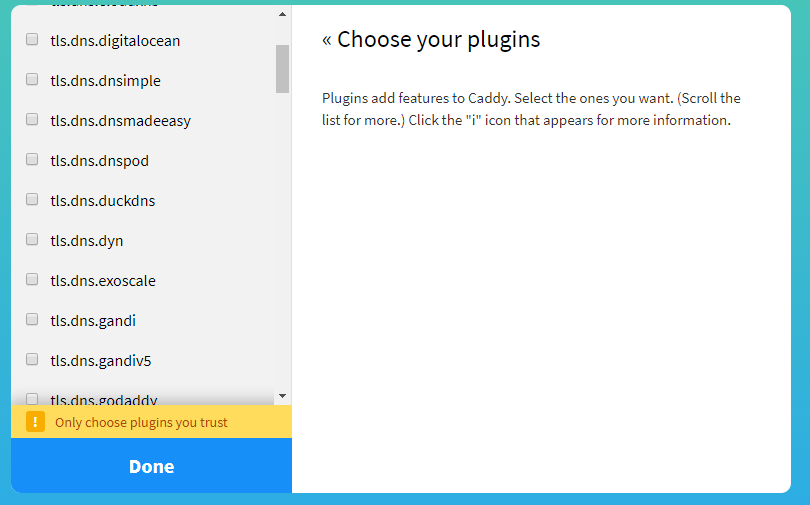
On the above, click in the checkbox next to tls.dns.duckdns.
I generally don’t enable Telemetry but that’s up to you if you want to provide anonymous feedback back to Caddy developers or not. If you do leave that disabled, you will get a nag screen prompt when you build it.
Lastly, select the plan. The free plan is only for non commercial use.
You will then be able to build & download Caddy. At the very bottom, you will also see this (or something like it depending on the options you selected)

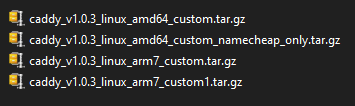
Once built, a file like this will be downloaded
Next, open the file in either Windows Explorer of Winzip or other zip program. It Will contain another file of the same name (but not a gz file now, a tar file) Open the tar file as well and you will see the following
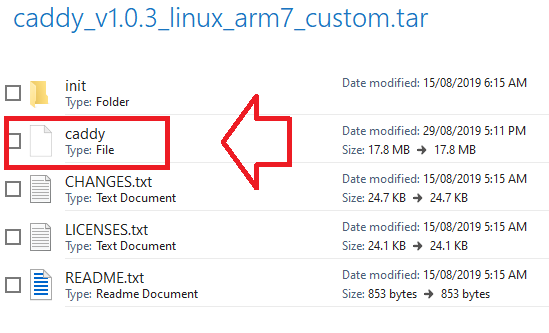
The caddy file as shown is the file we need to extract. This file is then renamed to caddy.bin and copied to the caddy folder
Note: you need to make sure this file is executable. (either chmod +x via ssh or use WinSCP and set the property to executable.
Having done that, now all we need to do is to configure the addon and start it up.
If you have not already, install the Caddy addon. To do this, you will need to add a custom repository to the addon store in Hass.io Go to the addon store and add https://github.com/korylprince/hassio-caddy as a repository and then install caddy.
The addon configuration looks like this:
{
  "flags": [
    "-agree",
    "-email",
    "your-email-here"
  ],
  "env_vars": [
    "DUCKDNS_TOKEN=your-token-goes-here"
  ]
}
Then you should be able to start the addon. In the log at the bottom you should see something like this:
Found custom Caddy: Caddy v1.0.3 (bunch of stuff here)
Running Caddy: DUCKDNS_TOKEN=entered token here /share/caddy/caddy.bin -conf /share/caddy/Caddyfile -agree -email email@email.com
Activating privacy features… done.
Serving HTTPS on port xxxxx
https://domain.duckdns.org:xxxxx
https://sub.domain.duckdns.org:xxxxx
Serving HTTP on port 80
http://domain.duckdns.org
http://sub.domain.duckdns.org
Where the xxxxx is the port you are using for https.
Then you should be able to access your home assistant with either the http://ip-address:8123 or via your external domain https://domain.duckdns.org:xxxxx
I want to use my own domain name..
Well the good news is you can and it’s very easy to do this. First, head on over to the Caddy website here (NOTE: Caddy has a new version and new docs and I will be writing a new post for that) to find your DNS provider Caddy setup information. I am going to use Namecheap as an example (and because I actually have all my domain names with them)

Here you can see the name to enter into the Caddyfile (namecheap) and the (in this case) two environment variables to use.
So as we did for DuckDNS above, you need to build your own custom version of Caddy with the namecheap plugin, unzip it as before, rename to caddy.bin and make it executable.
In your Caddyfile, instead of using duckdns, use this:
    tls {
	    dns namecheap
	}
using namecheap instead of duckdns.
Then on the namecheap site, in your DNS setup, you need to create an ‘AAAA’ record and/or an ‘A’ record with your static IPv6 and/or IPv4 IP address. You need to have your nameservers set to Namecheap BasicDNS and under Advanced DNS settings for the domain it will look like this:
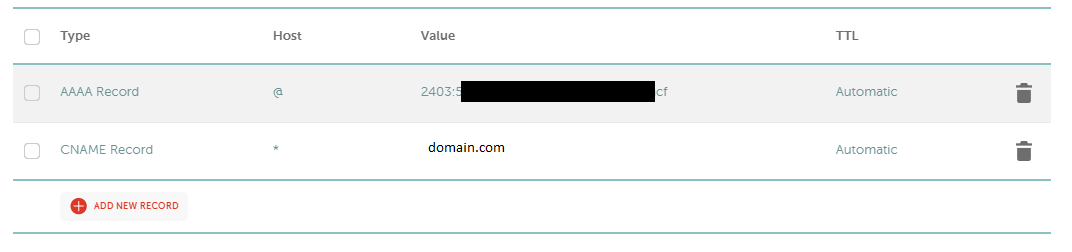
Just note the TTL is set to Automatic. You probably want to change that to the minimum time ~1 minute. Otherwise it might take up to 30 minutes per sub domain (if you have any) to get a certificate! See that I also ONLY have an AAAA record for my domain and a cname so my domain is only reachable via IPv6 which depending on your providers may not be what you want so add an ‘A’ record instead. Make sure to change TTL back to automatic when your certificates are issued. I think this only matters for the first time when it’s creating the domains.
You also need to apply for an API key from namecheap. They say it can take 24hrs but once you apply online go into online chat and they will enable it immediately. Do this from Profile>Tools on your dashboard.
Then in the Caddy addon configuration:
{
  "flags": [
    "-agree",
    "-email",
    "your-email-here"
  ],
  "env_vars": [
    "NAMECHEAP_API_USER=namecheap-username",
    "NAMECHEAP_API_KEY=namecheap-APIkey"
  ]
}
You should now be able to start the addon. You will see similar to this:
Found custom Caddy: Caddy v1.0.3 (bunch of stuff here)
Running Caddy: NAMECHEAP_API_USER=user-name-here NAMECHEAP_API_KEY=your-api-key-here /share/caddy/caddy.bin -conf /share/caddy/Caddyfile -agree -email david@wilfam.net
Activating privacy features... done.

Serving HTTPS on port xxxxx
https://domain.com:xxxxx
https://sub.domain:xxxxx

Serving HTTP on port 80
http://domain
http:// sub.domain
As with duckdns, you should have internal and external access using the domain or ip address.
You may have a few days of issues with your own domain as it can take some time for the dns to propagate around the net. SSL certificates will automatically update.
With this setup, I only have the ONE port opened/forwarded being port xxxxx. With IPv4 this port would be forwarded to port 80 on your home assistant machine or opened if using IPv6.