Originally posted 2019-01-10 12:50:58.

This post is my latest in a series of posts about using Sonoff devices in Home Assistant over MQTT. The main reason for yet another post is that the latest version 6.4.x firmware for Tasmota has changed the way it interacts with Home Assistant MQTT Discovery and there are also some other gotchas with the Arduino Core version used. OK I’ll stop talking jargon real soon I promise and hopefully that will make everything more clear.
First though, I’m just going to recap and post links to all my articles on the Sonoff Switches and Tasmota already posted on this site. To date, all my Sonoff switches are S22’s and in this post I’m going to introduce my use of the Sonoff SV. I’m going to go through how to build your own firmware and the reasons why you might want to do that as well. But first the recap.
| Date | Link | Content |
|---|---|---|
| 21st April 2018 | How to use a Sonoff Switch with Home Assistant | This was my original integration post which covered using the original Itead firmware with the eWeLink app and IFTTT as well as initially flashing a switch with Tasmota and using MQTT |
| 21st May 2018 | Home Assistant May 2018 updates & Tasmota Update | Version 0.70.0 and paid cloud option for Home Assistant. This was also the first time I used an OTA (over-the-air flash of new Tasmota Firmware) |
| 14th November 2018 | Sonoff Switches with Tasmota and new MQTT Addon Home Assistant | This is where I switched to using MQTT Discovery and the new MQTT v4 addon and integration in Home Assistant. The latter part of that post 'Flashing Sonoff Switches with Tasmota' contained wiring schematic as well as a partial 'flashing' video and also a video about fixing the power retain settings. |
Compiling your own custom version of Tasmota
I guess the obvious way to start this is to ask WHY anyone would want to do this right? Well I have a couple of reasons.
- All new version 6.x.x Tasmota firmware are too large to flash to a device over-the-air (OTA) in one ‘flash’. The flash chip in the devices mostly being used is a 1mb flash. When you flash OTA, the device has to be able to hold 2 versions of the firmware in it’s flash memory at the same time. This is because it will not wipe one version until it knows it has a new working version. In practice this means that the device firmware maximum size is around 510kb. All of the pre-compiled firmwares available on the Tasmota Github are larger than this. To circumvent this limitation, Tasmota also compile a ‘minimal’ version of their firmware so then they can use a 2 step flashing process… first flash the minimal version and then flash the full version (after a reboot of the device)
One of the advantages of compiling your own firmware is that you can disable any options you do not need and then when you compile the firmware it will be under 510kb and can be flashed in one step.
Given flashing firmware can be ‘hazardous’ and that sometimes switches might not be all that accessible, flashing once instead of twice can have advantages. - A more compelling reason for me though was because I was having WiFi/MQTT disconnects (a LOT of them) when I flashed version 6.4.0 of Tasmota whereas before with version 6.3.x and earlier I didn’t have any! Upon investigating this on the Tasmota Wiki I discovered that version 6.4.x was using a different version or Arduino Core than previously (See Troubleshooting section of Wiki).
Interestingly, Arduino Core 2.4.2 has known problems with Mesh Networks, FritzBox Routers and Auto-WiFi Channel assignments so I was 3 from 3 there. Arduino core 2.5.0 is fine with mesh and Fritz but still no auto-channel so I switched the router to a fixed channel and decided to use core 2.5.0. I could have gone back to core 2.3.0 but it has it’s own issues anyway. Version 2.5.0 has fewer dropouts and I can live with those (still many more that 2.3.0 ~ around 1 every few hours).
There are pre-compiled binaries for core 2.3.0, 2.4.2 and 2.5.0 on the Tasmota Github. But where’s the fun in that I ask!! (and also they are too big for a single flash)
Now just in case you start shaking at the thought of compiling your own Tasmota and flashing your device(s)… if you have ever flashed Tasmota to a device you have most probably already done this without even realising it!
I have previously mentioned how to do this but I am going to cover it here again now anyway.
Flashing Tasmota
- Download and install Visual Studio Code from the Microsoft Store in Windows 10. (I am only providing Windows instructions here. I’m sure it’s possible on a Mac but I have never done it! I only instruct what I do myself) So go ahead and open the windows store from the Windows icon on your computer.
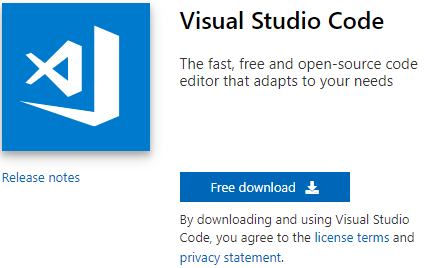
Click on the search in the top right and type in visual and you will see a link for
Visual Studio. Click on that and it will open up a web page where you can download Visual Studio.This is the one you want... not the Visual Studio 2017 download. Click on Free Download and download and install it on your computer.
Once downloaded and installed, run Visual Studio Code.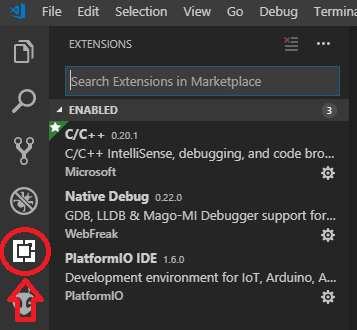
Next click on the extensions button (Red circle with arror pointing up at it) and type in PlatformIO IDE and add that extension to Visual Studio Code.
Mine is showing this way because it is already installed. If you have not installed it you will see an install button. - The next thing to do now is to go to the Tasmota Github Page and download the latest Tasmota.
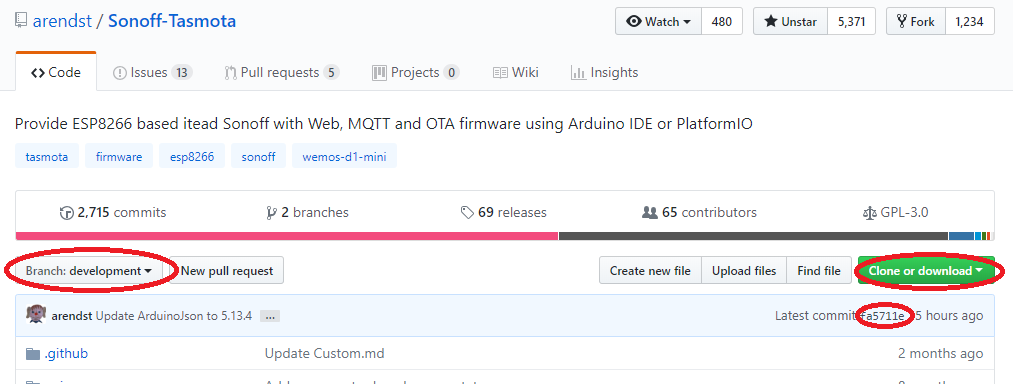 On this page note: On the left I have selected the Development Branch. You should select the ‘master’ branch unless you want to use a development version. Second, take note of the commit version.. in this case fa5711e – I use that commit ‘version’ as the name of the folder and zip file when I download the firmware.
Go ahead now and click on Clone of download and then click on Download ZIP. Download the zip file to somewhere you will be able to find it later and I add the commit number to the filename.
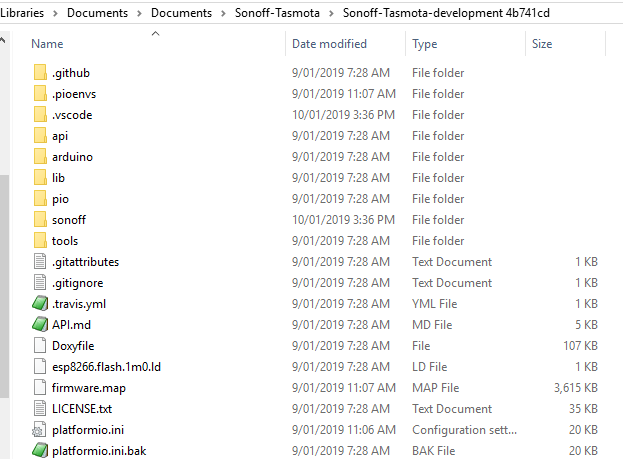
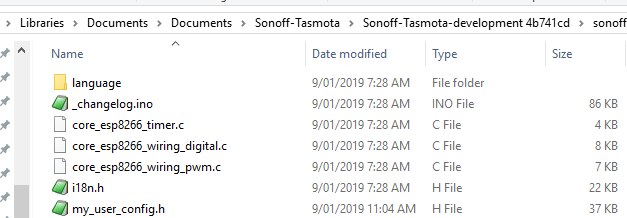
 Here you can see I have a Sonoff-Tasmota folder in my Documents as well as a couple of firmware versions and a zip file I downloaded a few days ago.
 - There are 2 files that contain settings we need to confirm and enter before we flash Tasmota. In the folder you created (above it is called Sonoff-Tasmota-development 4b741cd) there is a folder structure like this:
 Here you see a file platformio.ini This file contains settings for PlatformIO.
There are 3 parts of this file we are interested in.
First is the section up the top that looks like this:[platformio] src_dir = sonoff ; *** Uncomment one of the lines below to build/upload only one environment env_default = sonoff ;env_default = sonoff-minimal ;env_default = sonoff-basic ;env_default = sonoff-classic ;env_default = sonoff-knxAs per the instructions I have removed the semi colon and have set the env_default = sonoff. If you don’t do that, compiling the firmware will compile all variants of the firmware.
Secondly, we need to specify the Arduino Core we wish to compile the firmware with. As per point 2 above, the default is version 2.4.2 however I want to use version 2.5 To do this, we need to change this following section so it looks like this:
[core_active]
; Select one core set for platform and build_flags
;platform                  = ${core_2_3_0.platform}
;build_flags               = ${core_2_3_0.build_flags}
;platform                  = ${core_2_4_2.platform}
;build_flags               = ${core_2_4_2.build_flags}
platform                  = ${core_2_5_0.platform}
build_flags               = ${core_2_5_0.build_flags}
;platform                  = ${core_stage.platform}
;build_flags               = ${core_stage.build_flags}
This sets core to version 2.5.0
The last section we want to change is the com port used to upload the firmware:upload_port = COM4
To get the right com port number, you will need to load the device manager and identify the com port used for your USB-Serial adapter here:
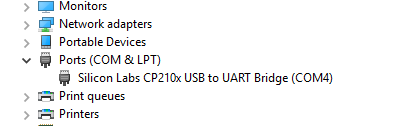
So mine is on COM4 which matches the upload port in platformio.ini - The other file to change is in the Sonoff folder.
The file my_user_config.h contains all settings.
There is so much in this file that is changed that I am not going to post it here. Instead you can download my file from here.
Line 64 & 65 enter your SSID and password.
Line 89 MQTT Broker IP address
Line 93 & 94 your MQTT Username and password
Line 138 your NTP Server
Lines 143 – 160 define Time Zone parameters and latitude/longitude so local times will be displayed in the console. (Current settings are Australian Sydney Time)
All of these changes are in Section 1 of the file.To assist you, you can get my copy of platformio.ini here (Note you can right click on link and save as platformio.ini)
Here is my_user_config.h You will have to edit this file to enter your settings.
My config file also sets tasmota to use a topic of sonoff, turns on discovery and makes all the other settings I recommended in my previous post here. - Big TIP for editing platformio.ini and my_user_config.h
Every time you download a new version of firmware, you will end up with a ‘fresh’ original copy of these files. Sometimes (frequently) other new options will be added to the files so you can’t really just copy over the one you edited. However, what I do is I use a free download called Winmerge which highlights differences in files side-by-side and it’s simple to copy changes from one file to the other so you can use your ‘master’ edited file and update settings in the new downloaded one and can also update the ‘master’ for any structural changes. Note that in the companion video for this blog post on youtube, I show how to use winmerge to do this. - Now that you have setup your configuration for Visual Studio Code and PlatformIO by editing platformio.ini and my_user_config.h it’s time to compile the firmware. There are a few ways you can do this. Simplest is to hit the side arrow button shown here:

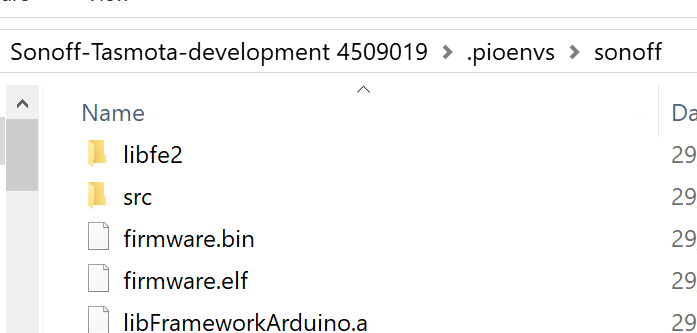
This will cause VSC/PlatformIO to build the firmware as specified in the platformio.ini file so if you edited it as shown, it will be just the main firmware file for sonoff. It is also possible to select the Terminal->Run Task and then select PlatformIO: Build (sonoff) from the dropdown menu. Whichever way you build it, the firmware will be found in the folder .pioenvs/sonoff as shown and will be called firmware.bin
- Having built the firmware the next step is to upload it to your sonoff devices. There are a number of ways this can be done. The easiest way is to use TasmoAdmin. This will allow you to specify the firmware file and then update all switches simultaneously. The other way is to use the individual device’s web interface and select the firmware.bin. You don’t need to select a minimal firmware for either of these options because if you followed my instructions, the size of the firmware will be smaller than the 510kb we spoke of above.
- Download and install Visual Studio Code from the Microsoft Store in Windows 10. (I am only providing Windows instructions here. I’m sure it’s possible on a Mac but I have never done it! I only instruct what I do myself) So go ahead and open the windows store from the Windows icon on your computer.
All of this is sounds like a lot but it’s actually quite simple and straightforward. To make it less intimidating, I made a youtube video that goes through it all. The volume in this video is a little bit low unfortunately but still quite easy to follow. It starts off with downloading the Tasmota firmware from Github.
Setting up a new Sonoff SV
One of the things I have been thinking about doing is getting a WiFi switch to control my house alarm and also my garage door opener.
The Sonoff SV is a cheap (<AUD$10) switch ideal for setting up as a dry-contact switch.

This switch is ideal for the task of opening/closing my garage door and alarm on/off.
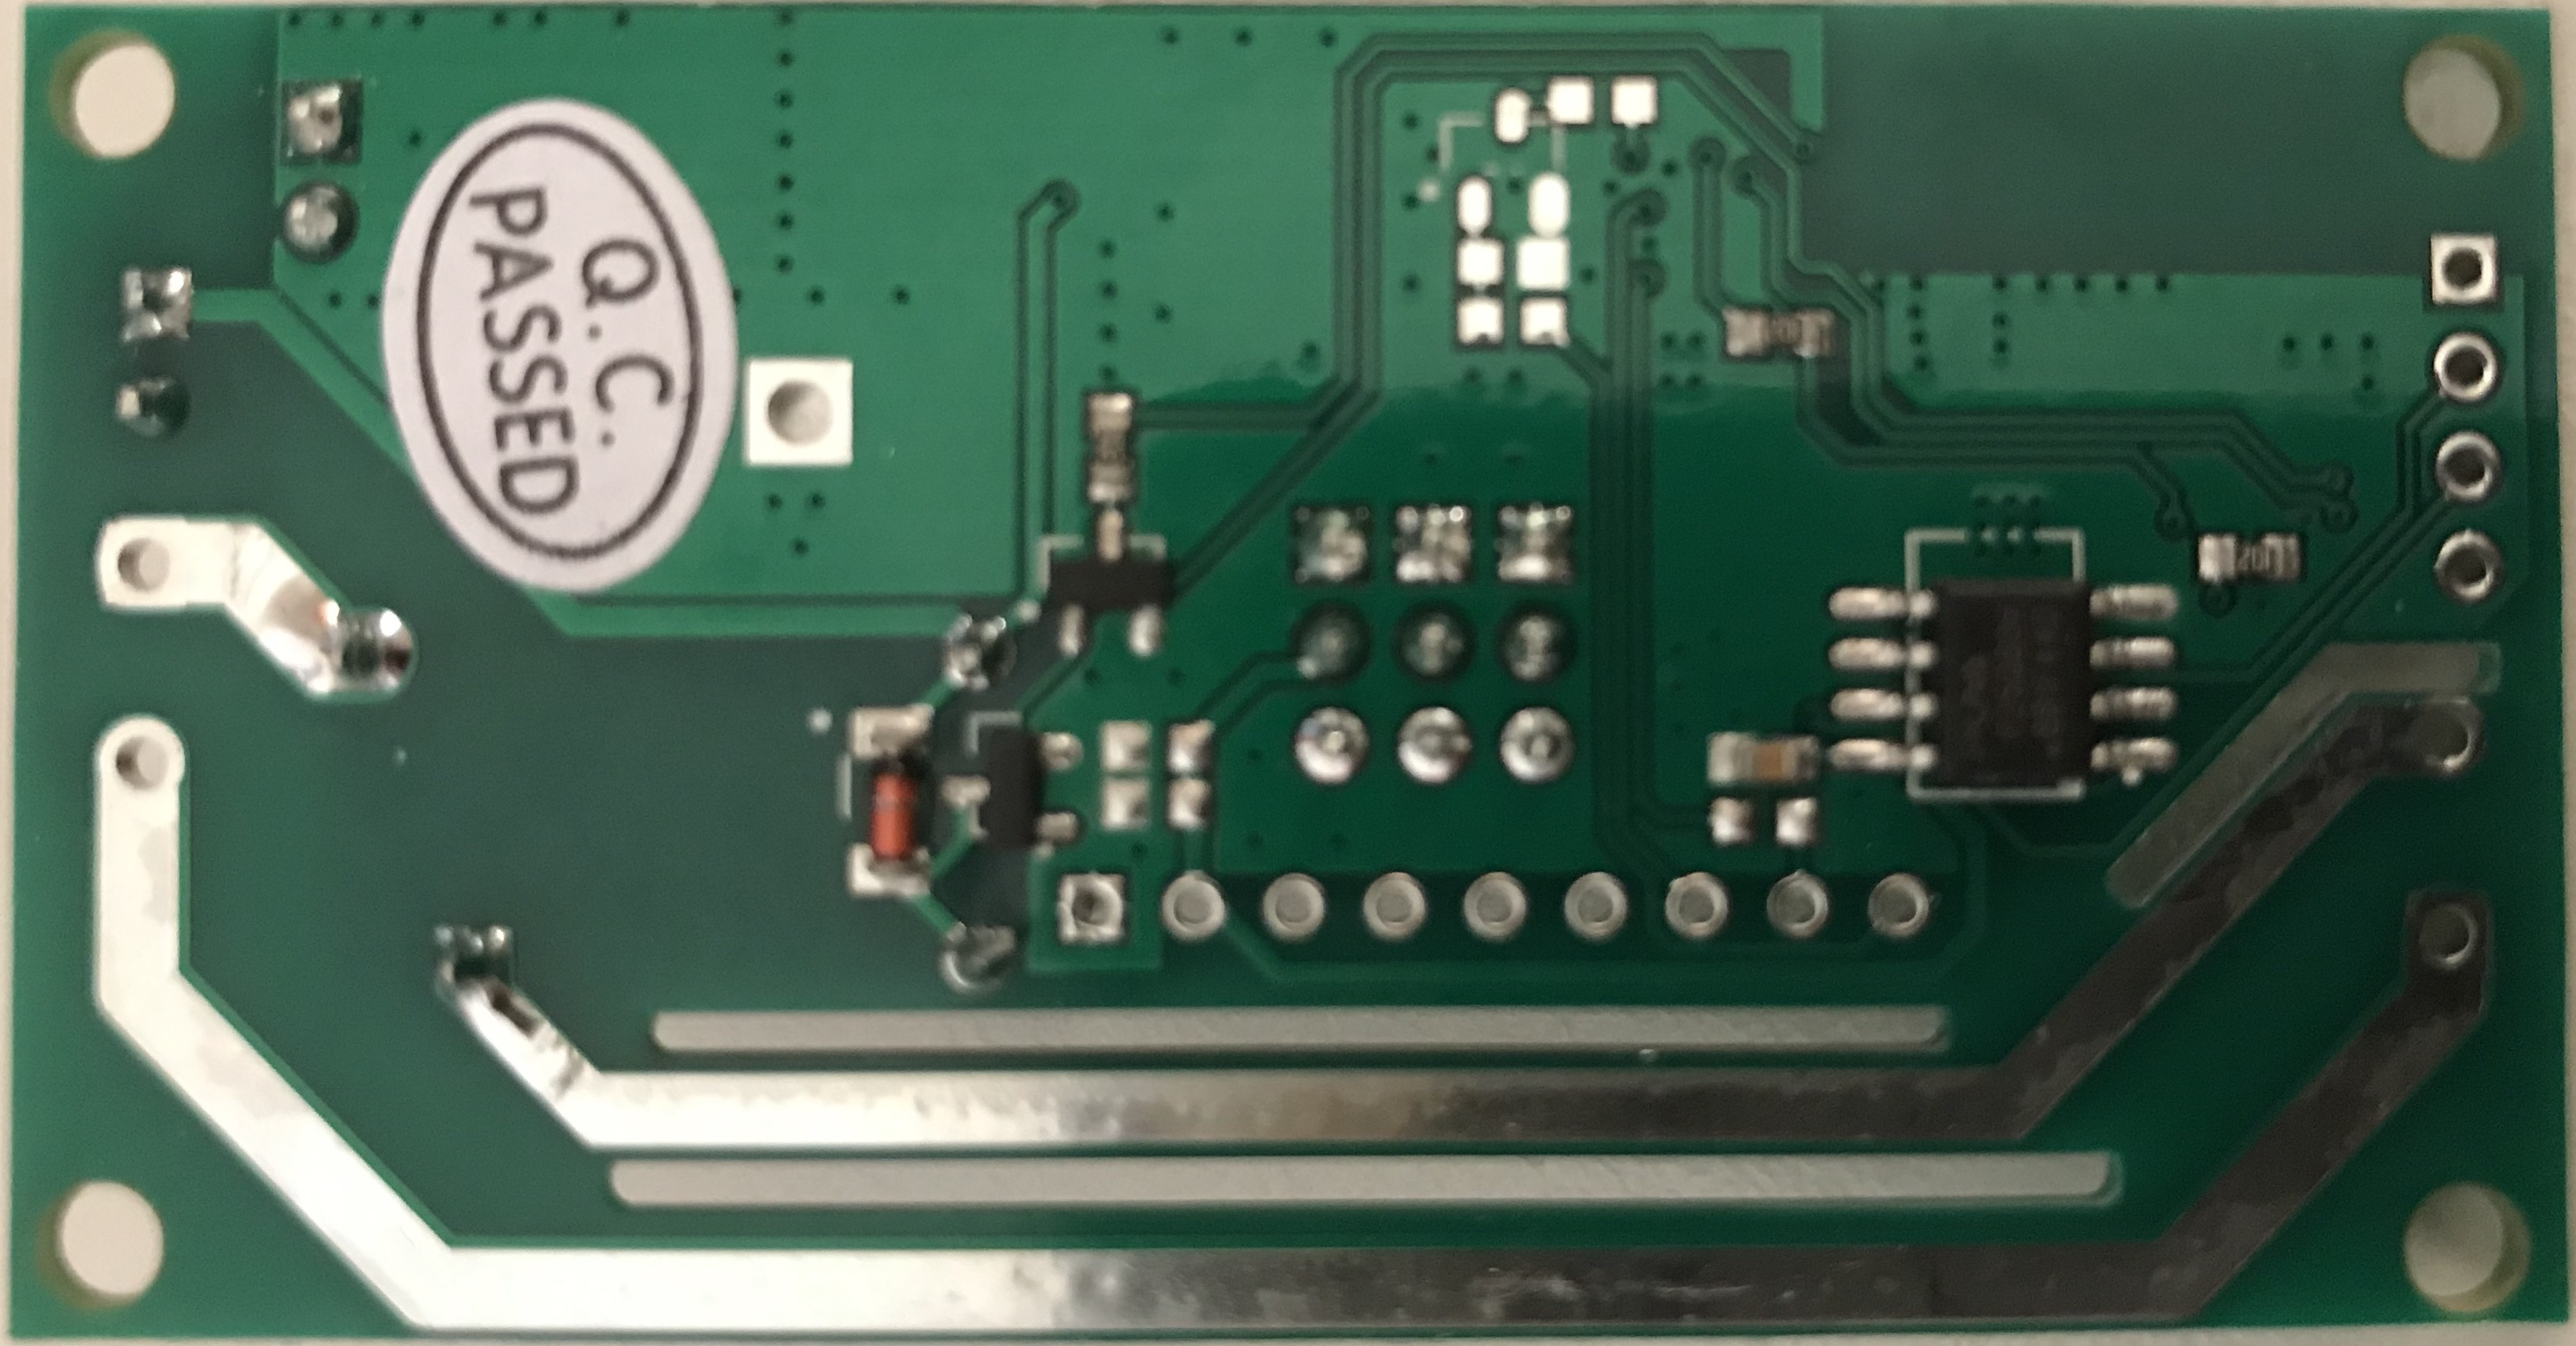
On the right side of the board the contacts for flashing the board are visible in the bottom right corner and the ‘output’ connector that will connect to the shutter roller/alarm relay is directly above.
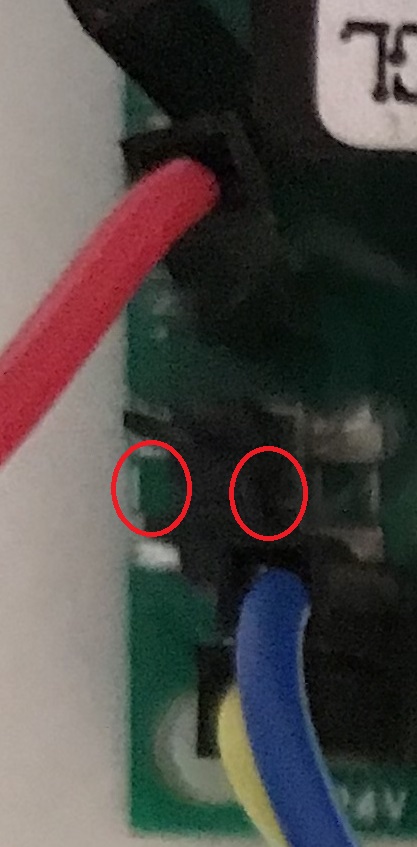
On the bottom left of the board there are a few things to take note of. You can’t quite see the input as because of the angle it’s obscured by the wifi module. The input pins are to be shorted out. I did this by soldering header pins into the input contacts and also soldered header pins into the output contacts. I then shorted out the input pins with a dupont cable but you could solder a wire across if you would prefer that. Also, there are 2 tiny resistors that need to be removed from the board – I simply used a flatblade screw driver slipped down between the adjacent header and the resistor and then a simple twist and it came right off the board. Two other pins are already soldered on to the board labeled + and -.
Regarding power, I had a 12v power supply rated at 400mA but there was not enough current to run the Sonoff SV. A 12v 500mA was fine. They say it works between 5v and 24v. I had mixed results using a USB adapter as well however this may be because the dupont wires are not that easy to solder..
Here you can see at the top the 2 pins shorted out, the power input at the bottom of the board with blue + and yellow – and you can see the ‘former’ location of the 2 resistors I prized off. Hopefully the next couple of photos might make this easier to view.
Here is what the end result looks like:
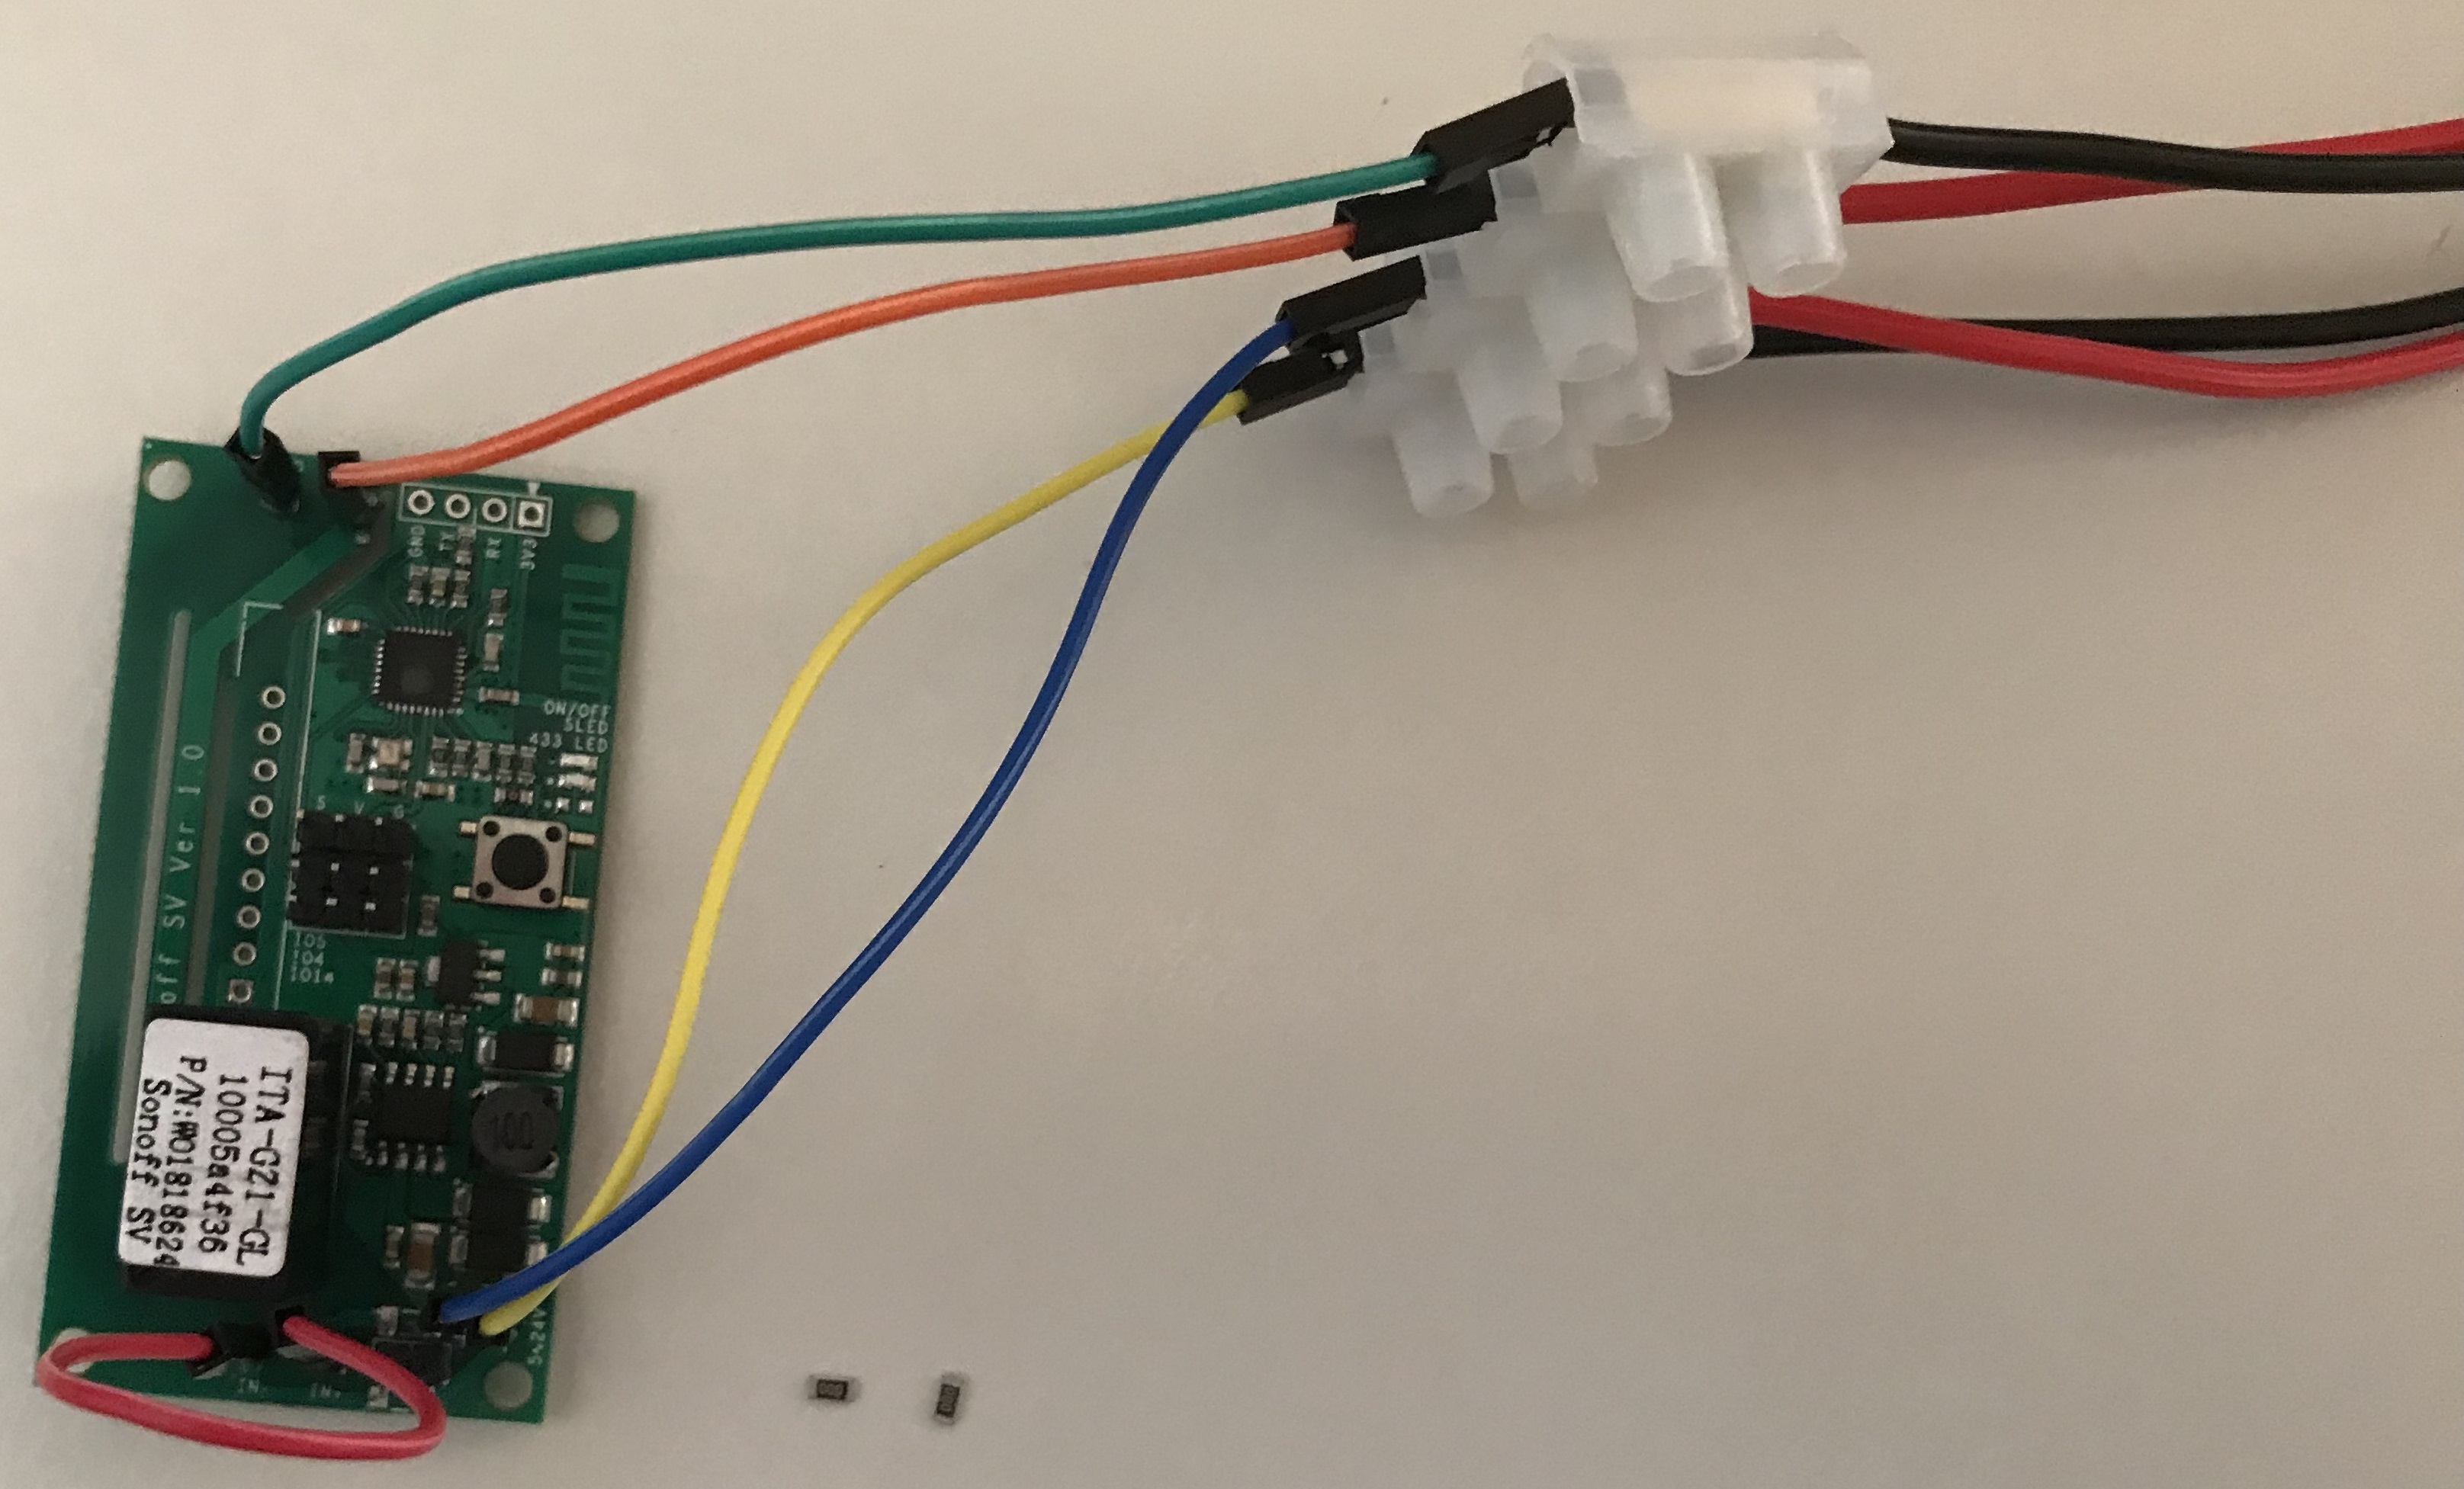
You can even see the 2 resistors I prized off the board near the middle left at the very bottom of the switch.
The wiring for the flashing is identical to the other sonoff devices I have flashed. You can see this and other information about flashing sonoff with Tasmota on my last post here with screenshots.
But I know what you want….. you want a video right? Well I made a video and you can view it here.
It is also possible to flash tasmota using a command line tool with esptool.py – details to install the requirements and esptool are detailed in the troubleshooting section on the Tasmota Wiki here. Specific instructions on how to clear the flash memory and install new firmware are detailed here.
Once everything is configured and wired up, I put it inside a small box like this:
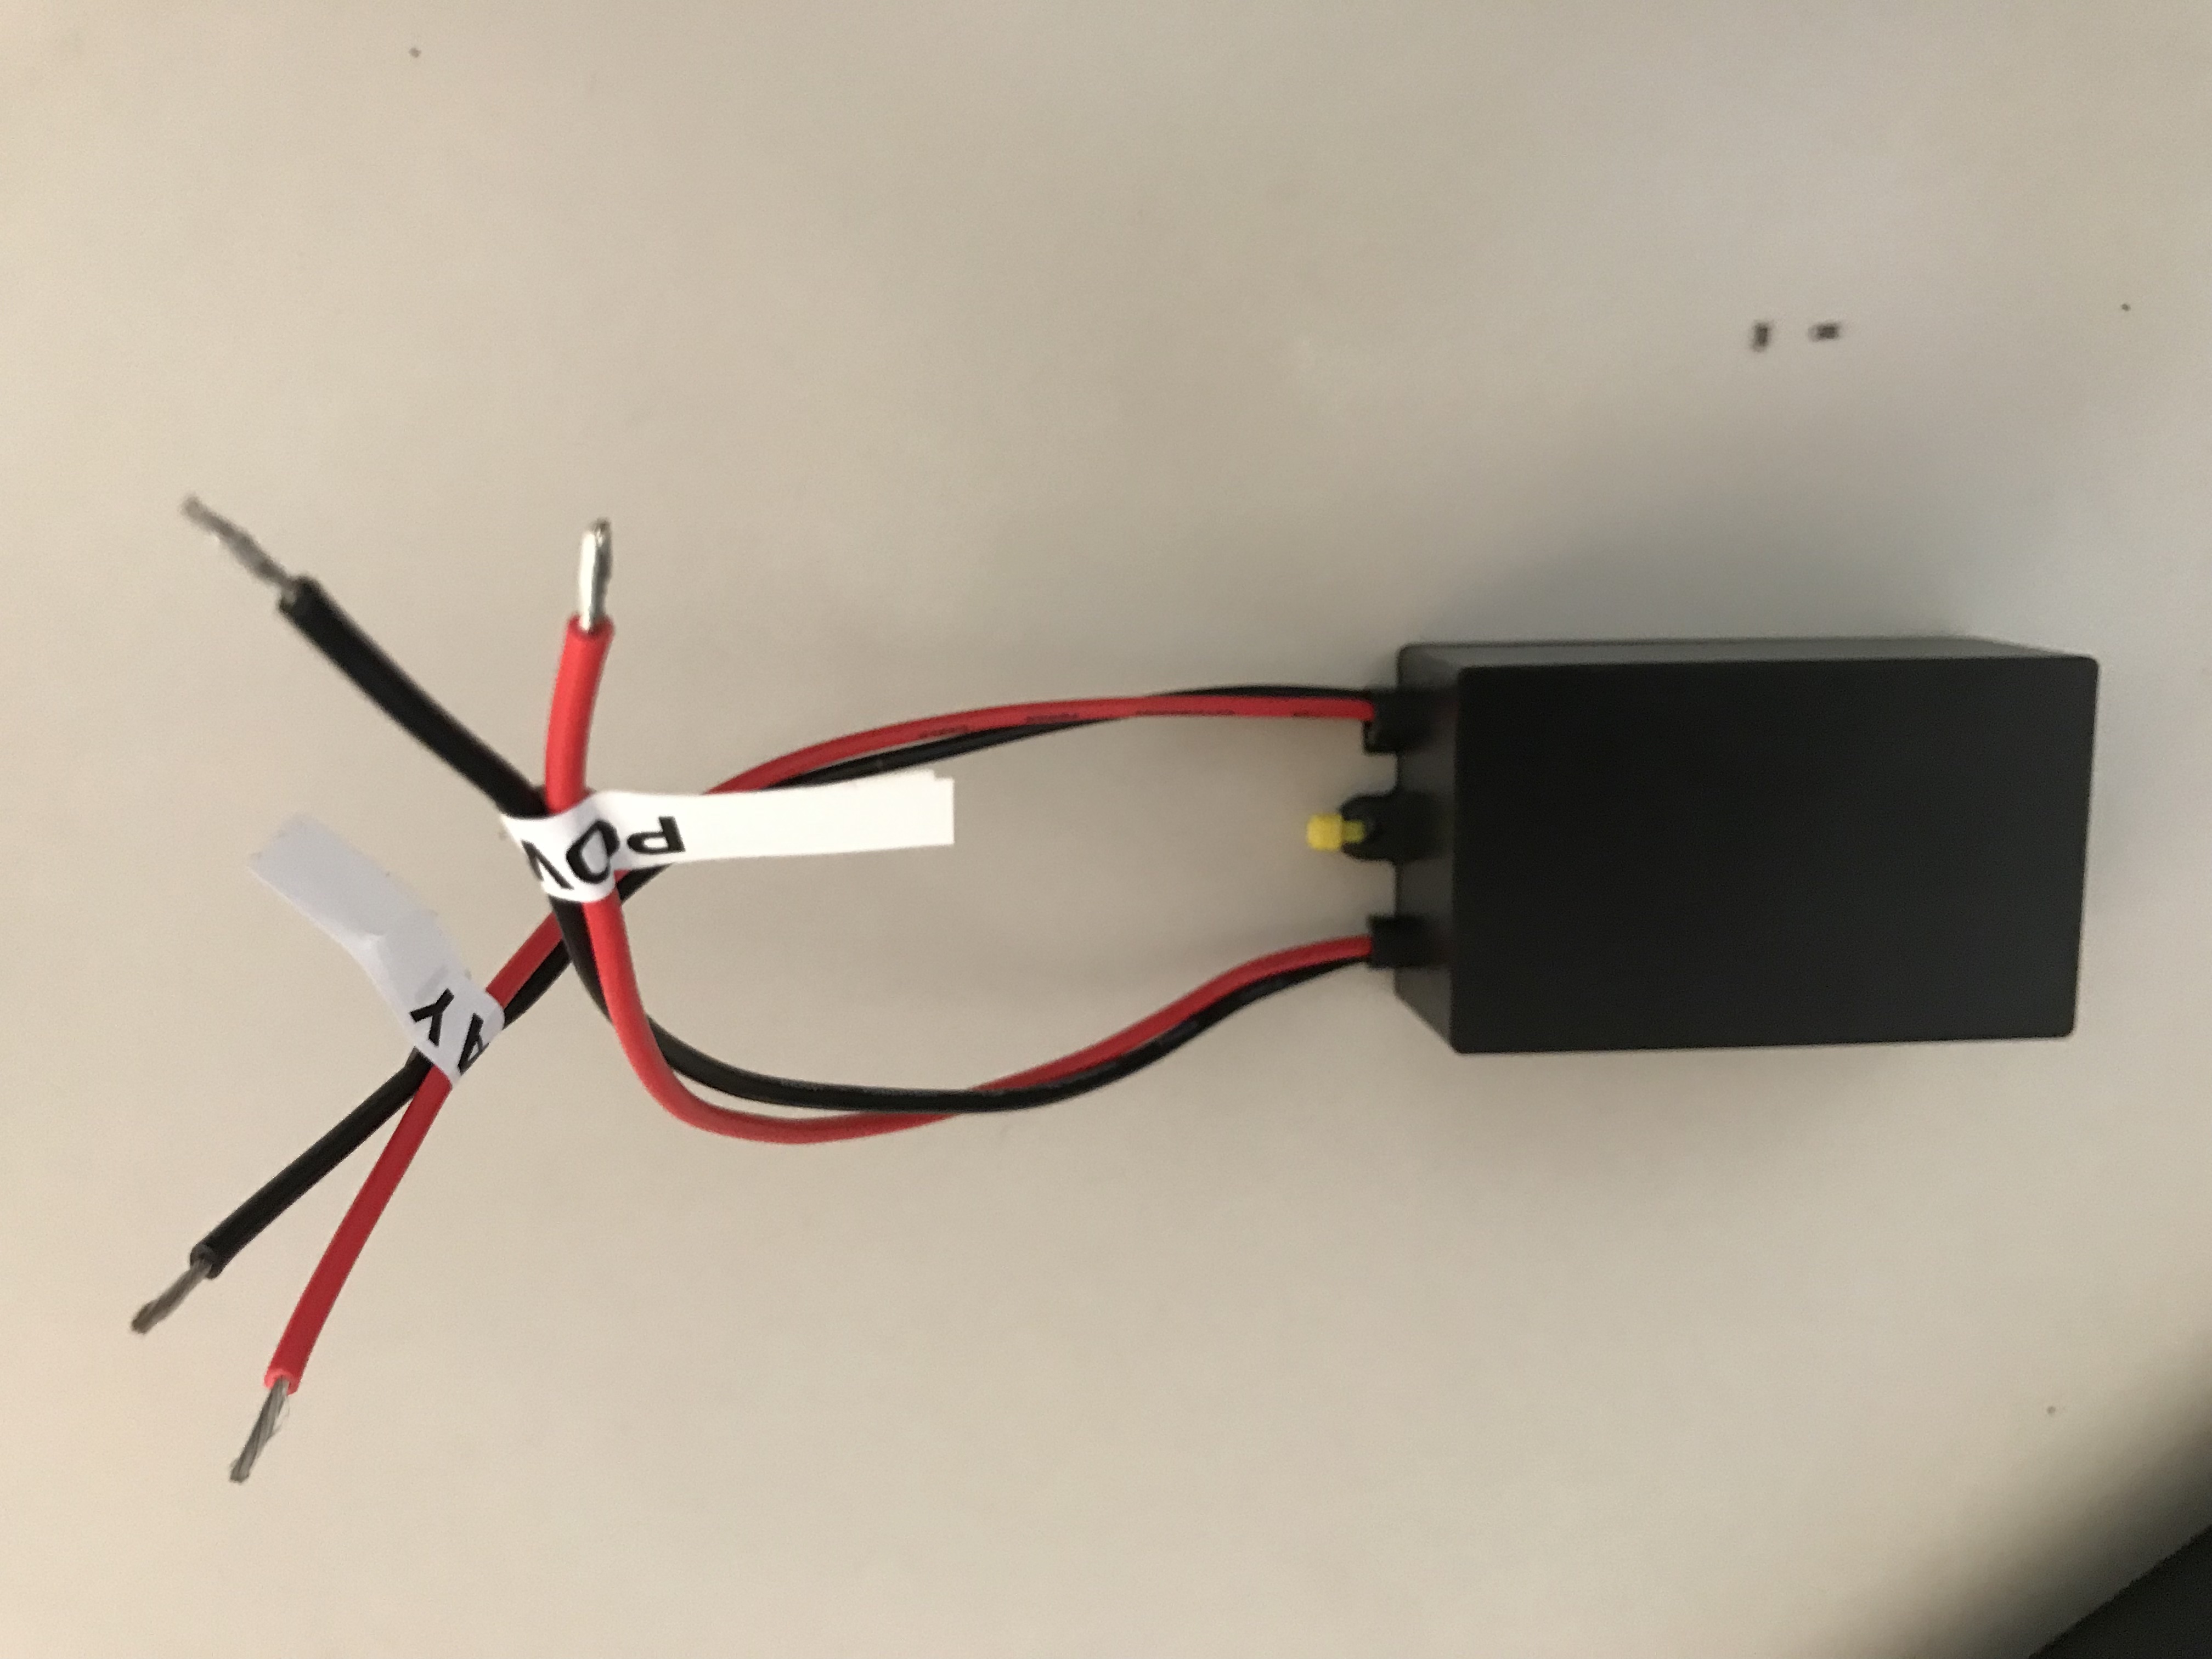
This just has the power and relay wires ready to connect into my alarm or garage door opener.
Setting up Sonoff for Home Assistant
Most of the settings I need to configure in the Sonoff have already been set when we compiled the firmware however I have 3 automations I use with my Sonoffs to set options or make them behave how I want them to.
Setting to initial options (includes comments)
See the important note at the bottom regarding firmware 6.4.1 and MQTT Discovery
- id: 'SonoffMQTTAuto'
  alias: Tasmota Initial Setup All Devices
  initial_state: 'off'                   # I only run this 'on demand'
  trigger:
  - platform: homeassistant
    event: start                         # You need a trigger but as the automation starts
  action:                                # 'off' it's not triggered automatically
  - service: mqtt.publish
    data:
      topic: sonoffs/cmnd/SetOption19
      payload: '1'                       # Discovery On
  - service: mqtt.publish
    data:
      topic: sonoffs/cmnd/SwitchRetain
      payload: '0'                       # Switch Retain Off
  - service: mqtt.publish
    data:
      topic: sonoffs/cmnd/ButtonRetain
      payload: '0'                       # Button Retain Off
  - service: mqtt.publish
    data:
      topic: sonoffs/cmnd/PowerOnState   # Power on State 3 - Turn relay(s)
      payload: '3'                       # on as last saved - default setting
  - service: mqtt.publish
    data:
      topic: sonoffs/cmnd/PowerRetain    # Enable MQTT power retain on status update
      payload: '1'
  - service: mqtt.publish
    data:
      topic: sonoff5/cmnd/PulseTime      # Specific for my Sonoff SV's
      payload: '20'                      # Sets to turn off after 2 seconds
  - service: mqtt.publish
    data:
      topic: sonoff6/cmnd/PulseTime      # Specific for my Sonoff SV's
      payload: '20'                      # Sets to turn off after 2 seconds
  - service: mqtt.publish
    data:
      topic: sonoffs/cmnd/Latitude       # Sets Latitude
      payload: !secret my_latitude
  - service: mqtt.publish
    data:
      topic: sonoffs/cmnd/Longitude      # Sets Longitude
      payload: !secret my_longitude
  - service: mqtt.publish
    data:
      topic: sonoffs/cmnd/TimeZone       # Sets TimeZone 99 (User)
      payload: '99'
  - service: mqtt.publish
    data:
      topic: sonoffs/cmnd/TimeDST        # Daylight time settings
      payload: '1,1,10,1,2,660'
  - service: mqtt.publish
    data:
      topic: sonoffs/cmnd/TimeStd        # Standard time settings
      payload: '1,1,4,1,2,600'
Those settings are run-on-demand for instance if I have reset the switch with the reset command, this re-establishes all my settings in one or 2 clicks. It runs only on demand. You could run it on every boot but there is no need.
Read Firmware Version on startup
- id: 'sonoff_firmware_installed'
  alias: Sonoff Firmware Installed
  trigger:
  - at: '00:00:00'
    platform: time
  - at: '12:00:00'
    platform: time
  - event: start
    platform: homeassistant
  action:
  - data:
      payload: '2'
      topic: sonoffs/cmnd/status
    service: mqtt.publish
  initial_state: 'on'
This just reads the installed firmware version installed for all switches. A command sent to the sonoffs ‘group’ goes to every device in that group. See the device specific pulse times in the previous automation only go to specific devices, not the group. Reading the firmware version enables a sensor I have set up to display the firmware and another sensor reads the current version of Tasmota Firmware available and notifies me if there is an update available.
Read Status on start
This automation reads if the switch is on or off so that the state is correctly displayed on my switches card. If you don’t have something like this, the switch will display as off when Home Assistant is restarted until the telemetry period automatically reads the status (could be up to a 5 minute delay)
- id: 'readstateonoff'
  alias: Power State Sonoff on HA Start-Up
  trigger:
  - event: start
    platform: homeassistant
  action:
  - data:
      payload: ''
      topic: sonoffs/cmnd/state
    service: mqtt.publish
  initial_state: 'on'
Important Changes in Firmware 6.4.x
In Sonoff 6.4.1 firmware, the way the topic is used has changed when you are using MQTT Discovery. In prior firmware versions, the topic was generally cmnd/sonoffs for example but this is incompatible with 6.4.x and discovery in Home Assistant. The second you enable discovery (which is done in the compiled firmware as my default actions or by SetOption19 On) the topic will change to sonoffs/cmnd. For this reason the above automations will not work if you are not using MQTT Discovery. If not using discovery you need to change the topics in all the automations.
A lot of people look down their noses when you use discovery. I find it works perfectly. With discovery, all settings are made on the devices in Tasmota itself and not configured in Home Assistant. It’s a personal preference. Be aware that Home Assistant itself is also moving increasingly towards automatic discovery and configuration. You can still do things in traditional YAML files but everything is becoming more accessible with GUI configuration for more and more into the future.